이미지 정보 태깅을 위한 TagButtonHandler 훅 구현하기
Elice SW Track 7기 - 15주차 진행 내용입니다.

인스타그램이나 오늘의집 처럼 특정 유저를 태깅하거나 상품을 태깅하는 기능을 구현하기 위해, 이전 포스팅에서 구현했던 custom dialog를 활용해서 이번 글에서는 이미지위에 태깅을 하고 정보를 입력하는 TagButtonHandler 훅을 구현해보도록 하겠습니다.
이전 글 - styled-react-modal 라이브러리로 customDialog 구현하기 : 링크
목차
2. 이미지 영역에 태그 정보를 추가하는 함수 구현하기
1. 사용자 스토리에 기반한 요구사항 도출
실제 코드를 작성하기 전에, 구현하려는 커스텀 훅이 사용자 기준에서 어떤 요구사항을 충족해야 하는 지 먼저 정리해보았습니다. 이렇게 요구사항을 텍스트로 정리해두면 어떤 코드를 작성해야 할 지 명확해집니다.
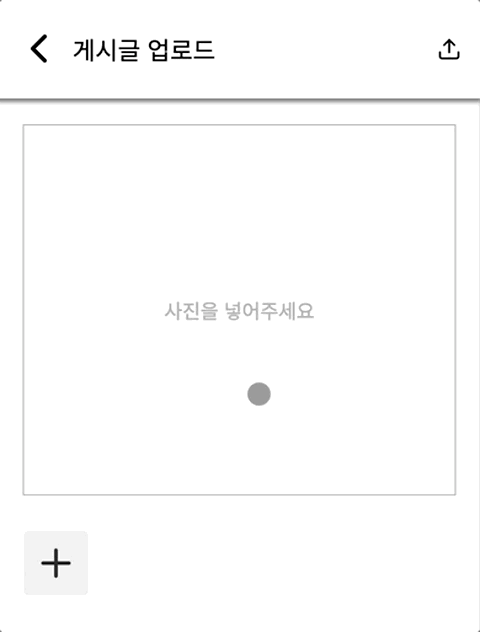
- 사용자는 피드를 작성 또는 수정하는 화면에서 이미지를 추가한 경우, 추가된 이미지 미리보기 영역을 클릭(or 탭) 시 해당 좌표에 태그 버튼을 추가할 수 있어야 합니다.
- 사용자는 추가된 태그 버튼을 클릭 시 정보를 입력하는 팝업에서 정보를 입력하고 저장할 수 있어야 합니다.
- 사용자는 피드를 조회하는 화면에서 정보가 입력된 태그 버튼을 확인할 수 있고, 클릭 시 저장된 링크를 새 창에서 확인할 수 있어야 합니다.
참고 - 예제 및 템플릿을 포함한 사용자 스토리 : 링크
이제 위에서 도출한 3개의 요구사항을 각각 코드로 작성해보겠습니다.
2. 이미지 영역에 태그 정보를 추가하는 함수 구현하기
/components/hooks 경로에 useTagButtonHandler.ts 파일을 생성합니다. 먼저 미리보기 영역의 상태인 target 과 미리보기 영역에 보여지는 currentImage, 그리고 추가된 이미지 배열인 imgList를 useState 훅을 사용하여 정의합니다. currentImage와 imgList의 타입은 feed 모델의 imgUrls 필드의 타입을 따릅니다.
import { useState } from "react";

export function useTagButtonHandler() {
  const [target, setTarget] = useState<HTMLDivElement | null | undefined>(
    undefined,
  );

  const [currentImage, setCurrentImage] = useState<
    | {
        url: string;
        tagPosition: {
          x: number;
          y: number;
        }[];
        tagInfo: {
          name: string;
          url: string;
        }[];
      }
    | undefined
  >(undefined);

  const [imgList, setImgList] = useState<
    {
      url: string;
      tagPosition: {
        x: number;
        y: number;
      }[];
      tagInfo: {
        name: string;
        url: string;
      }[];
    }[]
  >([]);

  ...
}
그 다음에는 target으로 설정된 엘리먼트 영역 내에서 클릭 이벤트가 발생했을 때 호출할 함수를 정의합니다. 현재 미리보기 영역에 보여지는 이미지 url인 showImage : string 와 발생한 마우스 이벤트의 좌표를 확인하기 위한 event : React.MouseEvent 객체를 인자로 받습니다. 에러 케이스를 먼저 리턴한뒤 이벤트 객체를 getCurrentMousePos 함수의 인자로 전달하여 좌표값을 리턴 받고, 리턴된 좌표값이 있다면 addTagPosition 함수에 showImage와 좌표값을 전달하여 태그를 생성하는 함수를 호출합니다.
addImageAnchor 함수
function addImageAnchor(showImage: string, event: React.MouseEvent) {
    const isCurrentImage = imgList?.find((item) => item.url === showImage);
    const maxAnchorCount = 5; // 이미지 당 최대 추가할 수 있는 태그의 갯수를 정의합니다.

    if (imgList.length === 0) {
      // 추가된 이미지가 없는 경우에 클릭 이벤트 발생 시
      // 에러 토스트 메시지를 띄워주고 return 합니다.
      toast.error("등록할 이미지를 추가해주세요.");
      return;
    }
    if (
      isCurrentImage != undefined &&
      isCurrentImage.tagPosition.length >= maxAnchorCount
    ) {
      // showImage로 전달된 url이 imgList에 존재하고,
      // 해당 이미지 객체의 tagPosition 배열의 길이가 최대 갯수를 초과할 경우
      // 에러 토스트 메시지를 띄워주고 return 합니다.
      toast.error(
        `상품 태그는 최대 ${maxAnchorCount}개까지만 추가하실 수 있습니다.`,
      );
      return;
    }

    const currentMousePos = getCurrentMousePos(event);

    if (currentMousePos) {
      addTagPosition(showImage, currentMousePos);
    }
  }
마우스 좌표를 반환하는 함수에서는 target으로 설정된 엘리먼트에 getBoundingClientRect 메소드를 사용하여 left, top, width, height 값을 변수로 가져온 뒤, 이벤트 객체의 x, y값에서 left, top 값을 뺀 결과값을 다시 비율로 환산하여 반환합니다.
getCurrentMousePos 함수
function getCurrentMousePos(event: React.MouseEvent) {
    const containerRect = target?.getBoundingClientRect();
    if (containerRect) {
      const x = event.clientX - containerRect.left;
      const y = event.clientY - containerRect.top;
      const boxWidth = containerRect.width;
      const boxHeight = containerRect.height;

      const mousePosition = { x: 0, y: 0 };
      mousePosition.x = x > 0 ? (x / boxWidth) * 100 : 0;
      mousePosition.y = y > 0 ? (y / boxHeight) * 100 : 0;
      return mousePosition;
    }
}
다음은 showImage와 일치하는 이미지의 index를 imgList에서 찾고, 해당 index에 tagPosition 배열과 tagInfo 배열에 좌표값과 빈 값을 추가하고 새로운 imgList를 반환하는 함수를 작성합니다.
addTagPosition 함수
function addTagPosition(
    showImage: string,
    position: { x: number; y: number },
  ) {
    const currentImageIndex = imgList?.findIndex(
      (item) => item.url === showImage,
    );
    if (currentImageIndex !== -1) {
      const newPosition = { x: position.x, y: position.y };
      const newInfo = { name: "", url: "" };
      const newArray = [...imgList];
      newArray[currentImageIndex].tagPosition.push(newPosition);
      newArray[currentImageIndex].tagInfo.push(newInfo);

      setImgList(() => newArray);
      return imgList;
    }
}
마지막으로는 커스텀 훅을 사용할 파일에서 import한 뒤, effect 훅을 사용해서 currentImage를 업데이트하고, imgList가 있다면 이미지 컨테이너 내부에 태그 버튼 컴포넌트 ImageAnchorButton 를 렌더링 하는 코드를 작성합니다.
export default function CreateFeed() {
  const {
    setTarget, // 태그 버튼을 담을 이미지 컨테이너를 지정합니다.
    imgList, // 추가된 이미지 목록을 저장합니다.
    currentImage, // 현재 보여지는 이미지 url을 저장합니다.
    setCurrentImage, // 현재 보여질 이미지의 url을 저장합니다.
    addNewImage, // 새로운 이미지 추가 시 사용할 메소드입니다.
    addImageAnchor, // 이미지 컨테이너에서 클릭 이벤트 발생 시 호출할 메소드입니다.
    updateTagInfo, // 태그 버튼의 정보를 업데이트 합니다.
    getTagInfo, // 태그 버튼의 정보를 가져옵니다.
  } = useTagButtonHandler();

  // ImgTagButton 갱신을 위한 effect 훅
  useEffect(() => {
    setCurrentImage(imgList.find((item) => item.url === showImage));
  }, [imgList, setCurrentImage, showImage]);

  ...

  return (
    <>
      ...
      <S.ImageContainer
        ref={setTarget}
        onClick={(event: React.MouseEvent) =>
          addImageAnchor(showImage, event)
        }
      >
        {showImage != "" ? (
          <S.FeedImage src={showImage} alt="피드 이미지" />
        ) : (
          <S.FeedImageEmpty>사진을 넣어주세요</S.FeedImageEmpty>
        )}
        <div
          onClick={(e: React.MouseEvent) => {
            e.stopPropagation();
          }}
        >
          {currentImage &&
            currentImage.tagPosition.map((item, index) => (
              <ImageAnchorButton
                key={index}
                index={String(index)}
                x={item.x}
                y={item.y}
                onSuccess={updateTagInfo}
                currentImage={currentImage.url}
                getTagInfo={getTagInfo}
              />
            ))
          }
        </div>
      </S.ImageContainer>
      ...
    </>
  )
}
3. 태그 정보를 저장하는 함수 구현하기
태그 버튼을 추가하는 함수를 작성했으니, 다음은 추가된 태그 버튼의 정보를 입력하고 저장하는 기능을 구현하겠습니다. 먼저 위에서 사용했던 ImageAnchorButton 컴포넌트를 작성합니다. 컴포넌트 내부에 useCustomDialog의 ConfirmPopup 레이아웃을 사용하고, onSuccess props로 전달된 updateTagInfo 함수를 호출하여 저장합니다.
ImageAnchorButton.tsx
import * as S from "./ImageAnchorButton.styles";
import { useCustomDialog } from "../hooks/useCustomDialog";
import * as SDialog from "../hooks/useCustomDialog.styles";
import { useEffect, useRef, useState } from "react";
import toast from "react-hot-toast";

export default function ImageAnchorButton({
  x,
  y,
  index,
  currentImage,
  getTagInfo,
  onSuccess,
}: {
  x: number;
  y: number;
  currentImage: string;
  getTagInfo: (current: string) => { name: string; url: string }[];
  index: string;
  onSuccess: (
    current: string | undefined,
    index: string | undefined,
    name: string,
    url: string,
  ) => void;
}) {
  const {
    ConfirmPopupLayout,
    toggleDialog,
    afterOpenDialog,
    beforeCloseDialog,
    opacity,
    isOpen,
  } = useCustomDialog();

  const [tagName, setTagName] = useState("");
  const [tagUrl, setTagUrl] = useState("");
  const [currentTag, setCurrentTag] = useState("");

  const tagNameRef = useRef<HTMLInputElement | null>(null);
  const tagUrlRef = useRef<HTMLInputElement | null>(null);

  useEffect(() => {
    tagNameRef?.current?.focus();
  }, [tagName]);

  useEffect(() => {
    tagUrlRef?.current?.focus();
  }, [tagUrl]);

  const buttons = [
    {
      name: "취소",
      usage: "NEUTRAL",
      onClick: () => toggleDialog(),
    },
    {
      name: "저장",
      usage: "SUBMIT",
      onClick: () => {
        let name;
        let url;
        if (tagNameRef.current) {
          name = tagNameRef.current.value;
        }
        if (tagUrlRef.current) {
          url = tagUrlRef.current.value;
        }
        if (!name || !url) {
          toast.error("모든 필드를 입력해주세요.");
          return;
        }
        onSuccess(currentImage, currentTag, name, url);
        toggleDialog();
      },
    },
  ];

  return (
    <>
      <S.AnchorButton
        title={index}
        x={x}
        y={y}
        onClick={(e: React.BaseSyntheticEvent) => {
          const tagInfo = getTagInfo(currentImage);
          setTagName(tagInfo[parseInt(index)].name);
          setTagUrl(tagInfo[parseInt(index)].url);
          toggleDialog();
          setCurrentTag(e.target.title);
        }}
      />
      <SDialog.ConfirmPopup
        isOpen={isOpen}
        afterOpen={afterOpenDialog}
        beforeClose={beforeCloseDialog}
        onBackgroundClick={toggleDialog}
        onEscapeKeydown={toggleDialog}
        opacity={opacity}
        backgroundProps=
        children={
          <ConfirmPopupLayout
            description="태그 정보를 입력해주세요."
            buttons={buttons}
          >
            <section>
              <label>태그 이름</label>
              <input
                ref={tagNameRef}
                name="tagname"
                type="text"
                placeholder="이름을 입력해주세요"
                onChange={() => {
                  if (tagNameRef.current) {
                    setTagName(tagNameRef.current.value);
                  }
                }}
                value={tagName}
              />
            </section>
            <section>
              <label>링크</label>
              <input
                ref={tagUrlRef}
                name="taguRL"
                type="text"
                placeholder="URL을 입력해주세요"
                onChange={() => {
                  if (tagUrlRef.current) {
                    setTagUrl(tagUrlRef.current.value);
                  }
                }}
                value={tagUrl}
              />
            </section>
          </ConfirmPopupLayout>
        }
      />
    </>
  );
}
이제 useTagButtonHandler 내부에 updateTagInfo 함수와 getTagInfo 함수를 작성하면, 2번 요구사항을 완료할 수 있습니다.
useTagButtonHandler.ts
export function useTagButtonHandler() {

  ...

  // 태그 정보를 저장하는 함수
  function updateTagInfo(
    currentImage: string | undefined,
    index: string | undefined,
    name: string,
    url: string,
  ) {
    const newArray = [...imgList];
    const imageIndex = imgList.findIndex((item) => item.url === currentImage);
    newArray[imageIndex].tagInfo[parseInt(index as string)].name = name;
    newArray[imageIndex].tagInfo[parseInt(index as string)].url = url;
    setImgList(() => newArray);
    toast.success(`${name} 태그를 수정했습니다.`);
  }

  // 태그 정보를 반환하는 함수
  function getTagInfo(currentImage: string) {
    const imageIndex = imgList.findIndex((item) => item.url === currentImage);
    const currentTagInfo = imgList[imageIndex].tagInfo;
    return currentTagInfo;
  }
}
4. 저장된 태그 정보 표시하기
피드를 작성하는 화면에서 태그를 추가했다면, 피드를 조회하는 화면에서는 저장된 태그 정보가 있다면 해당 태그를 표시하는 코드를 작성해야 합니다. 가장 먼저 조회 화면에서 태그 버튼을 렌더링하는 ImageFeedTagButton 컴포넌트를 작성합니다. 이 컴포넌트에서는 x, y, index, currentImage props를 전달받고, tagInfo 정보가 존재한다면 태그 버튼 클릭 시 tagInfo의 url 값을 새 창으로 띄우는 코드를 작성합니다.
ImageFeedTagButton.tsx
import * as S from "../ImageAnchorButton/ImageAnchorButton.styles";

export default function ImageFeedTagButton({
  x,
  y,
  index,
  currentImage,
}: {
  x: number;
  y: number;
  currentImage: {
    url: string;
    tagPosition: {
      x: number;
      y: number;
    }[];
    tagInfo: {
      name: string;
      url: string;
    }[];
  };
  index: string;
}) {
  return (
    <>
      <S.AnchorButton
        data-disabled={
          currentImage.tagInfo[parseInt(index)].url ? "" : "disabled"
        }
        title={index}
        x={x}
        y={y}
        onClick={(e: React.BaseSyntheticEvent) => {
          const targetUrl = currentImage.tagInfo[parseInt(index)].url;
          console.log(e.target.title, targetUrl);
          window.open(targetUrl, "_blank");
        }}
      />
    </>
  );
}
작성한 컴포넌트를 불러오는 코드를 조회 화면으로 import하여 코드를 작성합니다.
FeedItem.tsx
import ImageFeedTagButton from "../common/ImageFeedTagButton/ImageFeedTagButton";

export default function FeedItem(feed: FeedType) {
  ...

  return (
    <>
      <S.Container>
        <FeedHeader feedId={feed._id} userId={feed.userId} />
        <S.CustomSlider {...sliderSettings}>
          {feed.imgUrls.map((imgUrl, i) => (
            <Fragment key={`${imgUrl.url} + ${i}`}>
              <S.ImageSquareFrame>
                <img src={imgUrl.url} alt={"피드 이미지"} />
                {imgUrl &&
                  imgUrl.tagPosition?.map((item, index) => (
                    <ImageFeedTagButton
                      key={index}
                      index={String(index)}
                      x={item.x}
                      y={item.y}
                      currentImage={imgUrl}
                    />
                  ))}
              </S.ImageSquareFrame>
            </Fragment>
          ))}
          ...
        </S.CustomSlider>
      </S.Container>
    </>
  )
}

태그 Tag : #엘리스트랙 #엘리스트랙후기 #리액트네이티브강좌 #온라인코딩부트캠프 #온라인코딩학원 #프론트엔드학원 #개발자국비지원 #개발자부트캠프 #국비지원부트캠프 #프론트엔드국비지원 #React #Styledcomponent #React Router Dom #Redux #Typescript #Javascript